

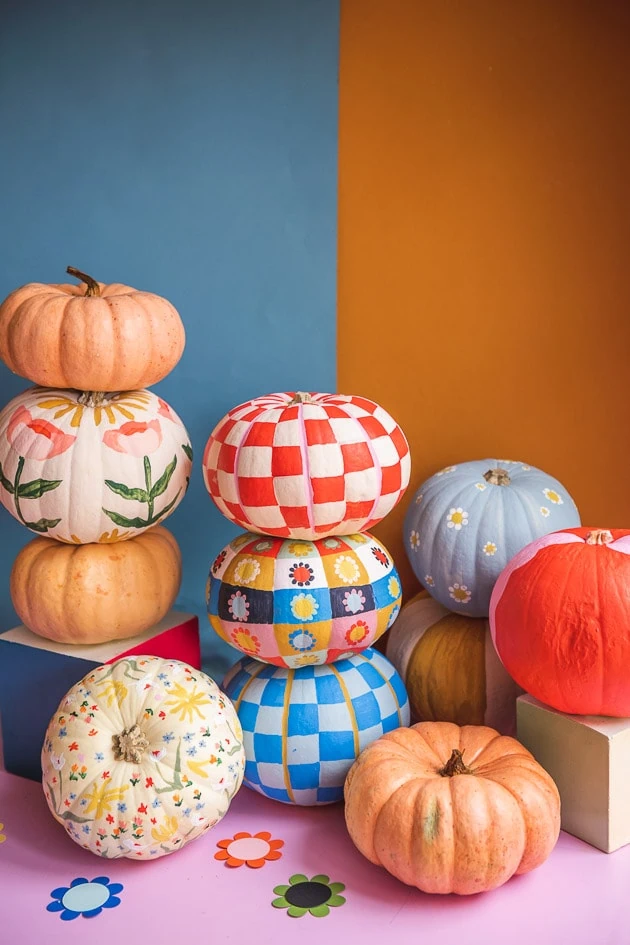
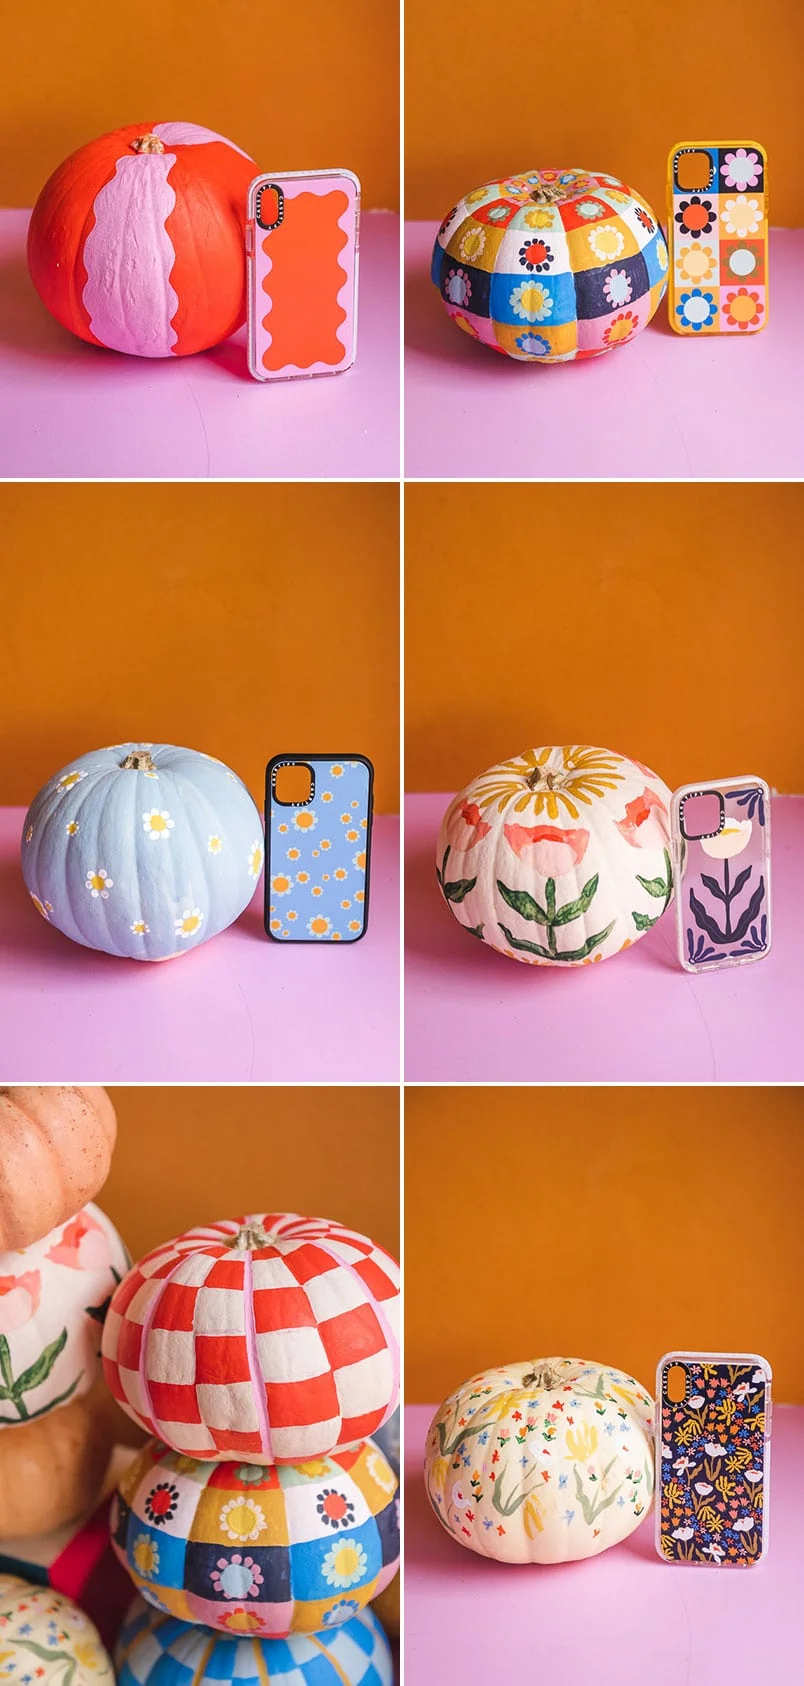
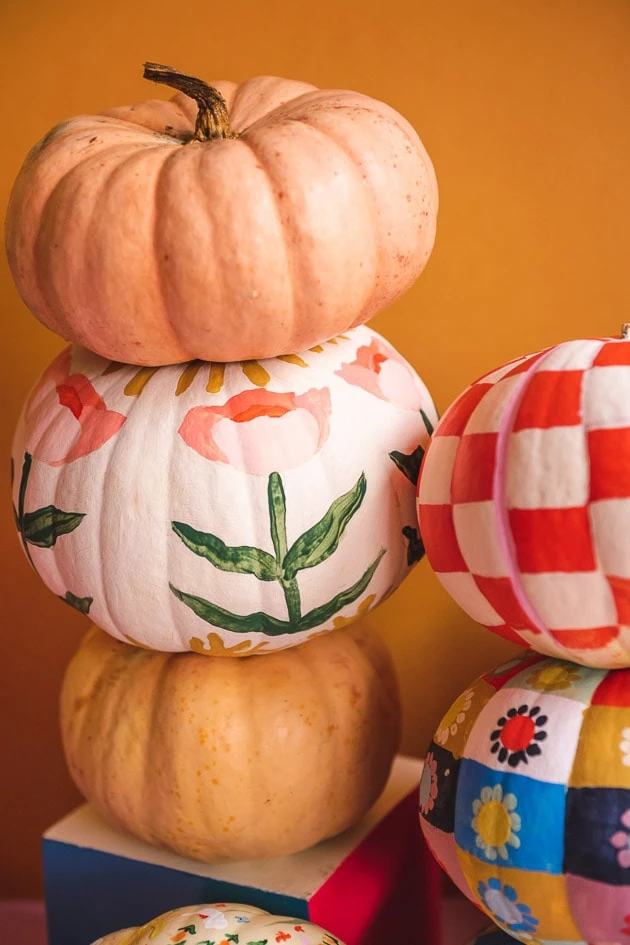
Among the many best discoveries of the ultimate decade was painted pumpkins. Agreed? No additional carving up a pumpkin with kids solely to stress about misplaced limbs and orange guts. It’s every gross and pointless. Whereas we’ve been big followers of a mini painted pumpkin for years (keep in mind our rainbow painted pumpkins and our faces pumpkins?), we obtained’t be stopping any time shortly so we dressed some up as impressed by our newest The Residence That Lars Constructed assortment with Casetify–because of they’re too cute! You’ll uncover methods to do checkerboard pattern, add easy painted flowers, straightforward stripes, and additional!
-make widget with the entire acrylic paint colors I obtained from michaels
–
I actually just like the look of all of our mini painted pumpkins this yr, significantly as a cohesive look. The reality is, the additional the upper! We based them off of our new Casetify assortment because of they’re positively worth replicating! The checkerboard is such a gratifying and easy pattern to paint as is the colorblock and squiggles. The florals take a bit additional work nonetheless they’re *chef’s kiss.* Do you’ll have a favorite? I’m leaning within the path of the parents floral, nonetheless then as soon as extra, that’s moreover my favorite case so there’s a theme there.
Learn the way to color mini pumpkins
We started out with white pumpkins so that will probably be less complicated to see the pattern. Orange works too, nonetheless you need additional layers of paint to see the design. It’s moreover less complicated for individuals who choose pumpkins with longer stems. I do know that because of we couldn’t uncover any and it was powerful! It’s good to have the flexibility to take care of onto one factor sturdy.
Provides
- white mini pumpkins (you have to have the flexibility to get these at most grocery outlets this time of yr!)
- acrylic or residence paint (see colors beneath!)
- paintbrushes
- UV sealant (optionally obtainable–retains the paint wanting good longer)
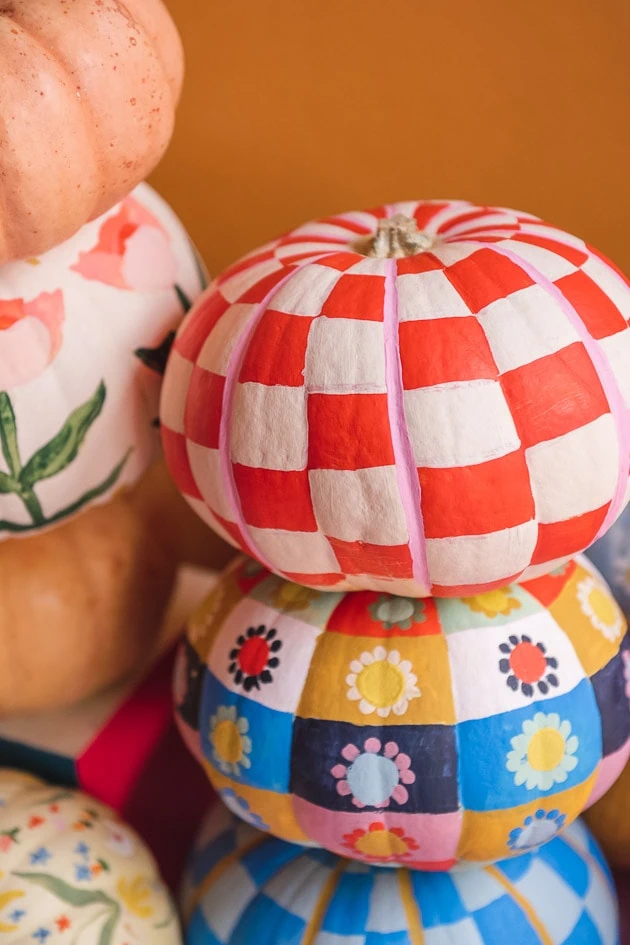
Learn the way to color a checkerboard pattern on a pumpkin
To create the checkerboard pattern on a pumpkin you’ll have to do the subsequent:
- Paint your full pumpkin inside the lighter of the two colors you propose to utilize. Let it dry,
- With a thin marker, draw strains down each of the mini pumpkin’s pure grooves. The strains obtained’t be fully measured, nonetheless they’ll be fairly a bit less complicated to paint this fashion!
- Draw even horizontal stripes throughout the mini pumpkin.
- Fill in every totally different subject with the darker paint! Ensure you cowl up the marker strains.
- We added in thicker accent stripes to mimic our cases just for gratifying
- Add in your UV sealant if desired.
Learn the way to make the quilted people floral mini pumpkin
- Use your eternal marker to draw out a grid pattern in your mini pumpkin, equally to the way you most likely did with the above checkerboard technique. We made ours two grooves thick so that the “quilt squares” had been larger.
- Paint inside the colors of your squares. Wait until dry.
- Use the tip of a pencil or large paintbrush to create a hoop of the petals contained within the squares.
- Paint contrasting circles onto each sq. inside the coronary heart of the petals.
- Use UV sealant if desired to seal the paint.
Learn the way to make wavy line painted mini pumpkin

Learn the way to make the easy floral painted mini pumpkin
- Paint your entire mini pumpkin in a steady background color.
- Adjust to the flower instructions from the quilted pumpkin, nonetheless with out the squares–merely place them spherical your pumpkin randomly!
- Use UV sealant if desired to seal the paint.
Learn the way to make large floral painted mini pumpkin
These are thought of certainly one of my favorites! I actually like the decorative issue it brings.
- Alongside together with your eternal marker, draw strains down the mini pumpkin’s pure segments, dividing it into even sections.
- Draw out your design in each half. Our design comprises an abstract flower on the prime (yellow), a tall, symmetrical flower taking over most of the pumpkin’s physique (in shades of crimson and pink with a inexperienced stem and leaves), and two abstract flowers on the bottom (yellow).
- Using the background color, paint in most of the pumpkin’s background. Stay away from painting over your sketch of the flowers, nonetheless for individuals who cross the marker strains a little bit of bit, it’s essential be okay. You merely want to go away adequate of your drawing in order to see the place to paint your flower.
- Alongside together with your yellow, pink, crimson, and inexperienced paints, paint within the the rest of your floral design.
- Use UV sealant if desired to seal the paint.
Learn the way to make the wavy lined painted mini pumpkin
- Paint your entire mini pumpkin in a steady background color.
- With an accent color, paint the outline of a wavy, squiggly design down the mini pumpkin’s side.
- Fill in your wavy kind with the similar accent color.
- Use UV sealant if desired to seal the paint.
Learn the way to make the delicate floral painted mini pumpkin
This one is such a fairly showstopper, and it’s method less complicated than it seems! You’ll use a top quality tipped paintbrush as a substitute of a foam paintbrush. Merely remember to scrub it between colors!
- If desired, paint your entire mini pumpkin a steady background color. I opted to not, as a substitute exhibiting off the beautiful white pumpkin color, nonetheless you do you!
- With inexperienced paint, paint little curved strains as flower stems and wavy inexperienced leaves coming off the underside of them. Distribute these throughout the pumpkin randomly.
- Prime the flower stems with white or light pink flowers with crimson services.
- Paint abstract yellow flowers throughout the pumpkin’s flooring.
- Fill in empty space with mini periwinkle, pink, crimson, and orange flowers. For these, merely make just some small brushstrokes. Paint a tiny inexperienced stem beneath or a white dot inside the heart for a definite vogue.
- Use UV sealant if desired to seal the paint.
Marbling technique didn’t work this time
We tried doing a marbling technique as impressed by our Casetify marbled case, nonetheless it merely wasn’t understanding. I’ll be sharing the failed mannequin over on Instagram (hahahaha!). In case you’ve a marbling technique that has labored for you to date, inform us!
We would wish to see the best way you’re painting your mini pumpkins this yr. Tag us with #LarsHalloween or #LarsMakes so we’ll see them!
Within the occasion you appreciated these painted pumpkins you might also like these ones:
Rainbow painted pumpkins
Pastel painted face pumpkins
DIY rainbow pumpkin arch
Pumpkin favor with leaf template