Making these honeycomb Easter eggs is such a gratifying strategy to spend a day! I don’t need damp days as an excuse to have a crafting day, nevertheless Spring begins and stops so many events in Utah that we’re positive to get as a minimum a few further chilly afternoons sooner than points warmth up for good. Regardless of your local weather, these honeycomb Easter eggs are sure to brighten up your property.
Longer Days and Hope for Spring
Making these honeycomb Easter eggs feels therapeutic after what has felt similar to the longest Winter ever. Spring in Utah is laughably capricious and I haven’t seen the tip of snow days, nevertheless now I am utterly REVELING in longer, hotter days. Between these honeycomb Easter eggs, the balmy local weather I have been having enjoyable with, and receiving the first dose of the COVID vaccine, I am feeling hopeful. And it’s about time! One factor I like about Easter is the consider progress and light-weight after a time of darkness and concern, and this yr it is really hitting residence.

Sitting proper right down to make these honeycomb Easter eggs is an effective various to use some mindfulness. Proper right here’s to the renewed hope that comes from every Spring and science.
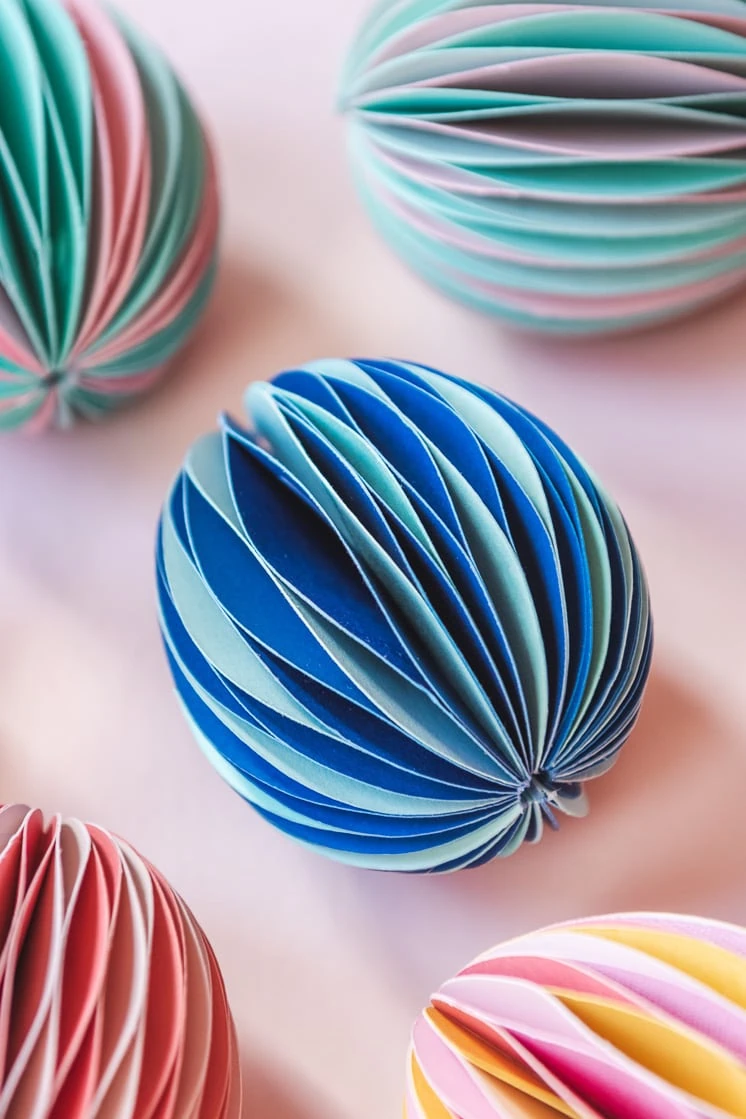
DIY Honeycomb Easter Eggs
Mixing paper colors whereas developing these eggs makes me actually really feel excited to dye Easter eggs rapidly, nevertheless these paper honeycomb eggs have the extra advantage of not at all going unhealthy. I like a enterprise that you’ll be able to do as quickly as after which toss into storage to take out yr after yr. No rotten egg odor proper right here!
It’s a good enterprise to do alongside along with your Cricut or completely different slicing machine, nevertheless in case you don’t have one you might nonetheless make these honeycomb Easter eggs. Merely get your scissors ready!
Gives:
Cardstock Paper, our honeycomb egg template, great glue, scorching glue, glue gun, Cricut machine (or else scissors and an elevated time dedication), ribbon for hanging
Thanks loads for making an attempt out these provides! If you buy through these hyperlinks we get a small charge (at no further worth to you) that helps us maintain the crafting.
Instructions:
- Receive the honeycomb egg template from our retailer
- Collectively along with your Cricut machine, decrease out the paper objects. We used 54 objects per ornament, which we now have been able to decrease from 3 objects of 12×12 cardstock.
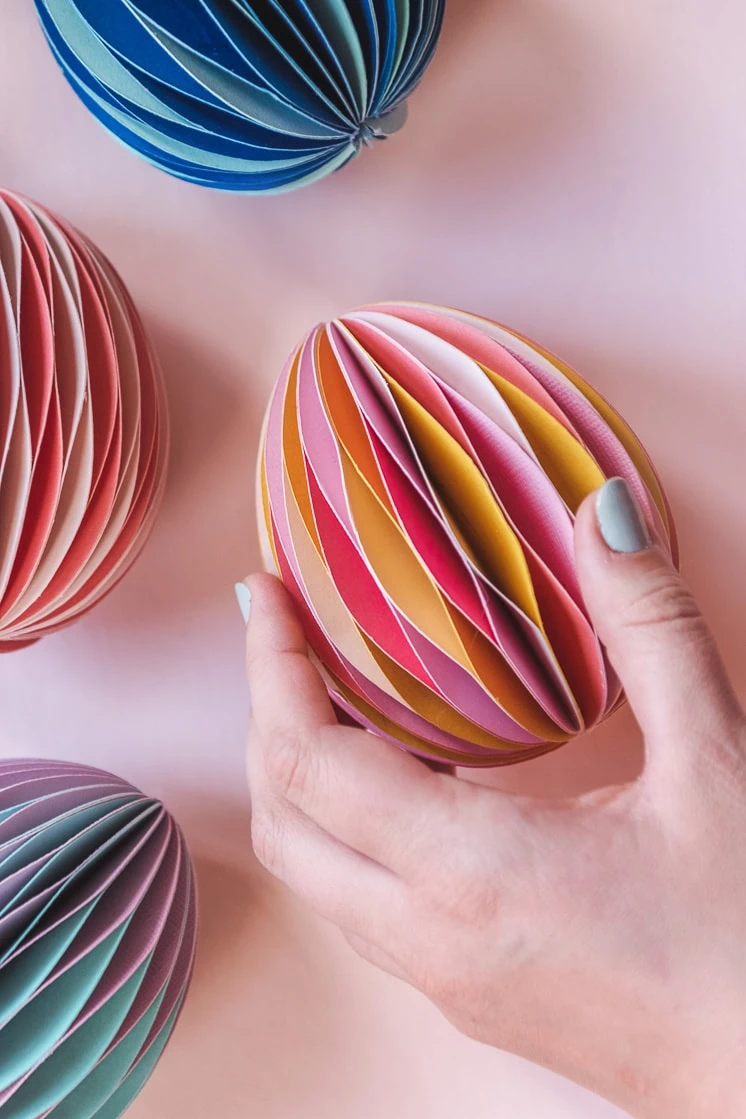
- Kind your egg objects proper right into a pile for every egg, with 50-60 cutouts in each pile. That’s whenever you’ll put collectively colors and patterns. We did a few variations of merely alternating colors, nevertheless the sky’s the limit proper right here (a kid-curated, random-looking egg could possibly be beautiful, too)!
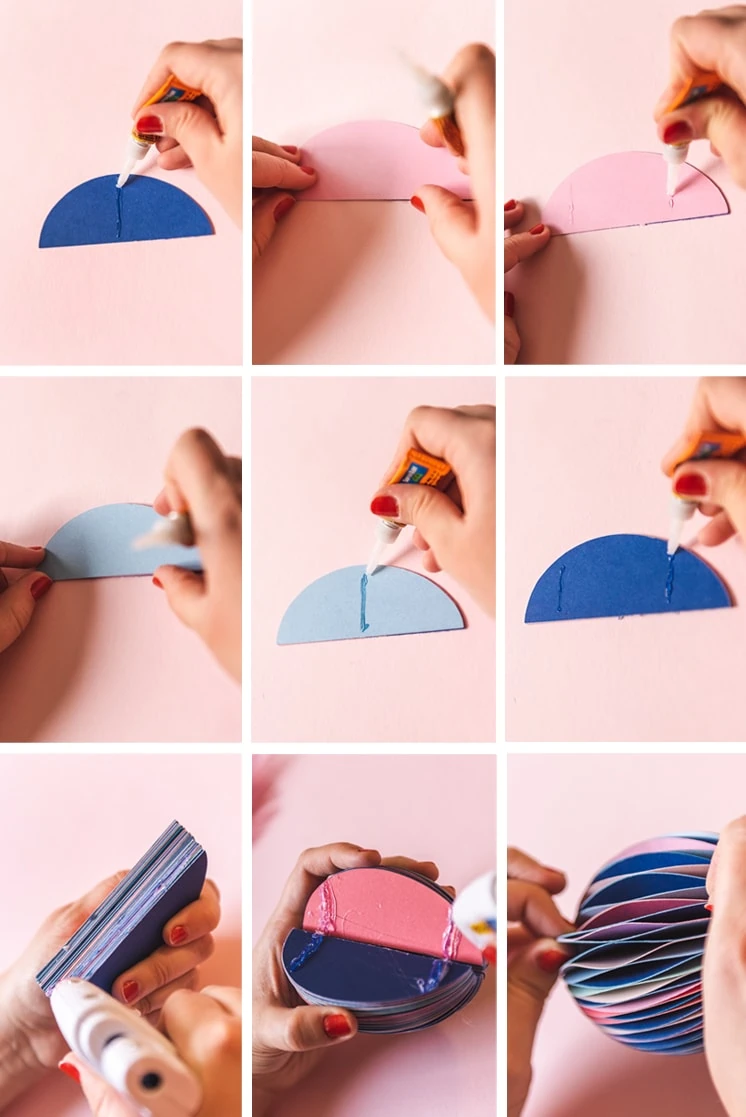
- Collectively along with your great glue, draw a line from the curved open air fringe of a cutout to the straight inside edge about halfway up the egg.
- Place the next cutout on excessive, taking care to line it up on excessive of the first one.
- Identical to one of the best ways you glued the first cutouts collectively, draw two strains from the pores and skin edge to the inside, one in direction of the underside of the egg and one in direction of the best.
- Place the next cutout on excessive.
- Repeat steps 4-7, alternating between one and two strains of glue, until you should have glued collectively your entire stack.
- Seal the spine of your egg by inserting a line of scorching glue alongside the straight inside edge and spreading it with the great and comfy metal tip of your glue gun. Repeat this until the spine is held collectively.
- Using your scorching glue, join every ends of a ribbon to the spine so that it might be hung up.
- Bend the beginning and end of your paper cutout stack so that they meet and secure with glue. Usually a few objects of paper will separate at this step. That’s okay! Merely dab just a little bit further glue between them and keep them collectively to secure them as soon as extra.
- Tadaa! You could have accomplished a honeycomb Easter egg! Make as many as you please and fill your property with Easter pleasure.